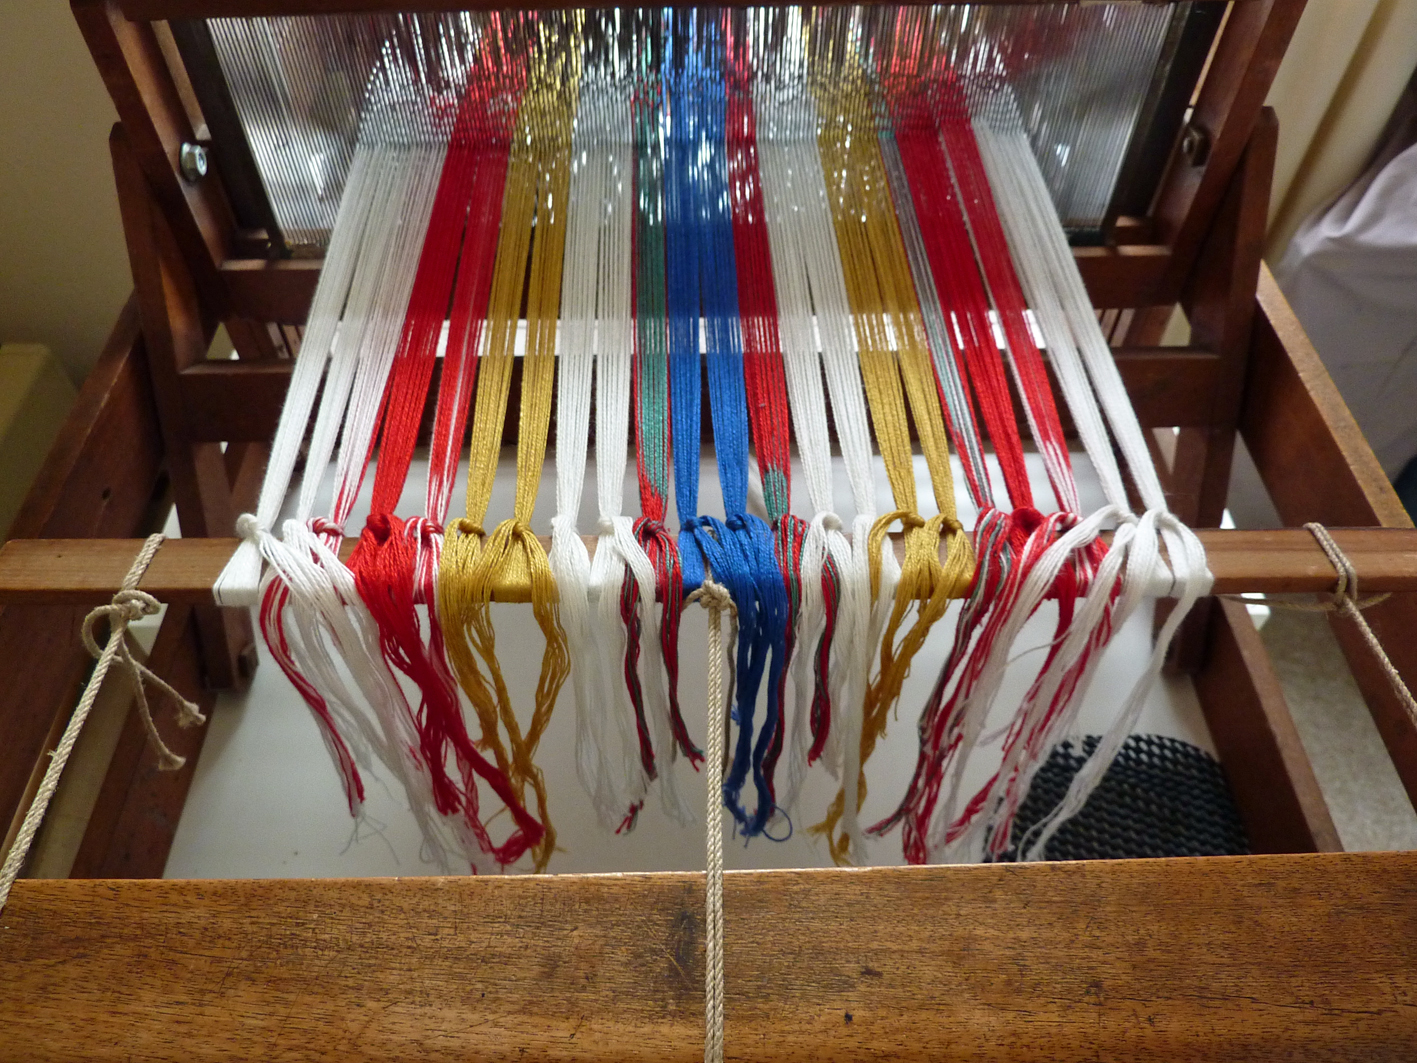
There was great excitement when The New Loom arrived promptly within 48 hours of being ordered. It arrived flat packed.
I had to wait until Saturday morning before Borneo could assemble it in peace and quiet and well rested. This thing with the levers is called 'the castle' I like that because it kind of looks like one.
Here I am threading the cords that hold up the shafts.
It took no time at all and it was looking beautiful. I keep on forgetting to say - please excuse the hideous wall paper in the background.
The loom is so clever. It folds flat for storage and transportation.
Every loom deserves to know that it will be well loved.
This is the test run. Again the threads are on the raddle, separating them before they are wound onto the back beam so that they come out the same size as whatever it is that you are going to weave.
She is now all threaded and ready to go in the morning when I will weave a small sample to decide on the final pattens for the scarf. She is an absolute dream to use, just so easy, and the threading was not arduous either.
I may be falling deeply in love.....
Monday, 23 May 2011
Sunday, 1 May 2011
A weaving adventure.
Then one winds the colours around some cardboard in combinations to see what the warp is going to be like and if one really likes the colours. I am aiming for something cheerful and primal.
This is the warping mill where the warp is wound to the length of the required cloth plus extra for samples and waste. There is a cross on each side to help to keep the threads separate for threading and to keep the shed (the threads apart for the different layers) open when weaving the weft.
This is what 308 threads look like.
The raddle is not an instrument of torture although many beginners believe this. It is tied securely to the back beam of the loom to aid with the threading process. This funny shape string actually holds it more tightly than any other way I have been shown so I REALLY want a record of it.
Now you can see the threads are being separated into groups to make them wind onto the back beam in their allotted place so that the warp is evenly wound across the beam. I hope you are not falling asleep with boredom...
This is what 616 stitches look like wound through the raddle around the back beam with brown paper to keep each layer seperate. This is a two person accomplishment. One holds the warp while the other winds. Those funny sticks are cross sticks which are inserted into the cross which I told you about before to keep the top and the bottom open. Now - let the threading begin......
Each thread is threaded from the back of the loom, through a heddle which is one of those silver things in the photo. There is a lovely little hole for it to pass through on its journey to the front of the loom. The heddles are on the shafts of the loom. The threading is not over yet
There is still the joy of threading them all through the reed, the silver and wooden bit at the front of the loom. The reed keeps the threads in place during the weaving process. The reed beats the weft into place too.
The ends of the warp are then tied to the front beam keeping the tension as even as possible and then the warp is tensioned. Let the weaving begin...
The first bit of weaving is a check that the threading is correct and makes all the threads stand to attention in their correct intended slot on the fabric. Here one holds one's breath............................... and sometimes very rude words escape before one tries to breathe again. If there is a threading error, it is undone at this stage and corrected and then checked again. Threads can be isolated and rethreaded.
Let the weaving begin....
This piece has 15" of sample warp so here I am playing with colours before the proper weaving begins. It is going to be a my first tubular cloth if I am clever enough to manage not to weave the front and the back together. I had forgotten just how much I love doing this!!
The project has started.
Monday, 7 February 2011
A Haven of heaven.
Last week, I took off to the Weavers Loft near Stockbridge to learn how to spin on a spinning wheel. I had a lovely chat with Julie before I went. She has three wheels which I could try. There may just be a spinning wheel in my future....
Robyn and I went through for my first lesson on Wednesday morning and the second on Thursday because my hip is still mending and I did not want to place any strain on it. I had so much fun both days that I forgot to take photos and was admonished by everyone who I spoke to about it.
I went back on Saturday and spent 4 hours spinning in this little craft haven. It is a lovely comfortable place where people are encouraged to try things and to work at their own pace. It is one of the loveliest learning environments that I have spent time in. One of the things that I enjoyed the most was the sharing of knowledge.
I sat here while I was learning to spin on the traditional Ashford wheel. I seem to have fallen in love with it despite my thoughts of wanting something completely different.
This is some yarn that I spun earlier in the week. I filled the whole bobbin, well almost.
The Weavers Loft is a working studio. It has equipment and craft supplies everywhere which I love. There are baskets of hand-spun yarn,
Robyn and I went through for my first lesson on Wednesday morning and the second on Thursday because my hip is still mending and I did not want to place any strain on it. I had so much fun both days that I forgot to take photos and was admonished by everyone who I spoke to about it.
I went back on Saturday and spent 4 hours spinning in this little craft haven. It is a lovely comfortable place where people are encouraged to try things and to work at their own pace. It is one of the loveliest learning environments that I have spent time in. One of the things that I enjoyed the most was the sharing of knowledge.
I sat here while I was learning to spin on the traditional Ashford wheel. I seem to have fallen in love with it despite my thoughts of wanting something completely different.
This is some yarn that I spun earlier in the week. I filled the whole bobbin, well almost.
The Weavers Loft is a working studio. It has equipment and craft supplies everywhere which I love. There are baskets of hand-spun yarn,
baskets of bobbins for lace making,
baskets of embroidery thread
and a wall of beads along with the other craft supplies.
Then there are all the beautifully handmade and wood-turned gifts that abound, displayed in creative ways around the studio.
Lastly, there are looms, especially this beautiful floor loom which I covet.
This is a little haven of heaven for anyone who enjoys fibre crafts and wood. I look forward to my next visit on Thursday.
Monday, 24 January 2011
Forest Spring Echo FLowers
I joined the Historical Craft KAL for this project and it has been great fun. It is one of the nicest ways to knit something as there is a lot of help and and great comments on the forum. It is the first time I have done one of these and has promptly encouraged me to join Taziana's mystery KAL which starts in a couple of weeks.
Here are some lovely pics of a shawl that I thoroughly enjoyed knitting. It was a lovely intuitive pattern and worked so well even when my brain was absent. I loved the way it looked like a ball of yarn before it was blocked and if my brain was operational, there would have been an photo of it before it was blocked.
Blocking in France is an adventure. I finally settled on the clothes airer which I pinned a towel too and the stretched the shawl out after it had been soaked and spun in a pillowcase in the washing machine.
Here it is drying in the weak sun today.
Trudi quite fancies it. It is in her colours. When I saw this yarn I knew it wanted to be an Echo Flowers. It reminds me of a forest spring with autumn leaves in it.
My photography skills are not great today. I seem to be out of focus in places.
Here are some lovely pics of a shawl that I thoroughly enjoyed knitting. It was a lovely intuitive pattern and worked so well even when my brain was absent. I loved the way it looked like a ball of yarn before it was blocked and if my brain was operational, there would have been an photo of it before it was blocked.
Blocking in France is an adventure. I finally settled on the clothes airer which I pinned a towel too and the stretched the shawl out after it had been soaked and spun in a pillowcase in the washing machine.
Here it is drying in the weak sun today.
Trudi quite fancies it. It is in her colours. When I saw this yarn I knew it wanted to be an Echo Flowers. It reminds me of a forest spring with autumn leaves in it.
My photography skills are not great today. I seem to be out of focus in places.
A close up of the edge.
Draped artistically.
Friday, 14 January 2011
Borneo's Bright Blues
After I had finished knitting my mittens there was a great humphing beside me when I wore them. SOMEONE noticed that it was much easier for me to operate my camera..... I quietly ordered some yarn online and when it did not arrive in time before the French Trip, I rushed in to C&H and bought some. SOMEONE accompanied me and was quite sulky until I waved the yarn under his nose and said, " This is the colour blue that you wanted?" The sunshine came out in his grin and all was right with the world.
So now they are waiting for him when he arrives next week to join me here, hanging on the lemon tree.
Robyn tells me she is holding the yarn that arrived at home as hostage. She thinks it is some wonderful painted lace weight that I ordered.
So now they are waiting for him when he arrives next week to join me here, hanging on the lemon tree.
I used my pattern from the early blog post and adjusted it accordingly. Thank you Trudi, for the loan of the hands.
Thursday, 13 January 2011
Yesterday's fun
Thanks to Jeni from Fyberspates, breakfast this morning was a stylish affair.
Before Christmas she posted a picture of an aran tea cosy which she had designed and knitted. You can find it on Ravelry. It delighted me and made me smile. I do not drink tea. I watched her site for a kit to be posted but so far I have not seen one or I have missed it. I would have bought it in an instant and still will.
It inspired me. While out shopping in Perpignan yesterday, I bought a chunky yarn and came home to create the Cosy Cafetiere Cover last evening. It was such fun. I found the rolling pin buttons in the shop in Perpgnan and loved them.
It is the prototype and I shall do another soon with some adjustments. Thank you, Jeni.
Before Christmas she posted a picture of an aran tea cosy which she had designed and knitted. You can find it on Ravelry. It delighted me and made me smile. I do not drink tea. I watched her site for a kit to be posted but so far I have not seen one or I have missed it. I would have bought it in an instant and still will.
It inspired me. While out shopping in Perpignan yesterday, I bought a chunky yarn and came home to create the Cosy Cafetiere Cover last evening. It was such fun. I found the rolling pin buttons in the shop in Perpgnan and loved them.
It is the prototype and I shall do another soon with some adjustments. Thank you, Jeni.
Friday, 7 January 2011
Merino Mittens
After I had worn my festive mitts, I was in love. I decided to make another pair with slightly longer finger sections as it is cold when I use my camera and it is great to have my fingers free.
After listing to the Knitting Pipeline Podcast, I realised that I had already started the little cabled twist stitch rib that Paula said she was using for her mitts. It is a stitch that I often use as it gives beautiful detail and is easy to do.
You knit into the second stitch of K2 in K2, P1 rib and then into the first before pulling both stitches off the needle at the same time.
So the Festive Mitt pattern was altered in the following way:
4 row cable rib pattern
Knit 1 row
Twist stitches next row
Knit 2 rows
Pattern Alterations
30 rows cable rib
6 rows knit before the thumb gusset.
The body of the mitt is exactly the same.
After removing the thumb stitches knit 6 rows.
10 rows cable rib
Cast off loosely.
Join yarn for thumb as per pattern
Knit 6 rows
Cable rib 6 rows.
Cast off loosely.
Happy knitting and do message me on Ravelry if you make them! I would love to see them.
After listing to the Knitting Pipeline Podcast, I realised that I had already started the little cabled twist stitch rib that Paula said she was using for her mitts. It is a stitch that I often use as it gives beautiful detail and is easy to do.
You knit into the second stitch of K2 in K2, P1 rib and then into the first before pulling both stitches off the needle at the same time.
So the Festive Mitt pattern was altered in the following way:
4 row cable rib pattern
Knit 1 row
Twist stitches next row
Knit 2 rows
Pattern Alterations
30 rows cable rib
6 rows knit before the thumb gusset.
The body of the mitt is exactly the same.
After removing the thumb stitches knit 6 rows.
10 rows cable rib
Cast off loosely.
Join yarn for thumb as per pattern
Knit 6 rows
Cable rib 6 rows.
Cast off loosely.
Happy knitting and do message me on Ravelry if you make them! I would love to see them.
Subscribe to:
Posts (Atom)